A secure hold starts with careful preparation. With clean, dry nails and a careful application, your HELVA press-on nails can last 2 to 3 weeks. Wear varies with your nails and everyday activities.
Follow the complete application and removal demonstrations below, alongside the written steps. You can revisit each gesture at your own pace, from preparing your nails to cleaning them for another wear.
What is in your kit
- Press-on gel nails in several sizes, decorated by hand
- Adhesive gel stickers
- A small wooden stick for application and removal
- The printed 10 step application guide
The included gel adhesive stickers attach your HELVA nails without liquid nail glue or a UV lamp.
The 10 steps to a manicure that holds
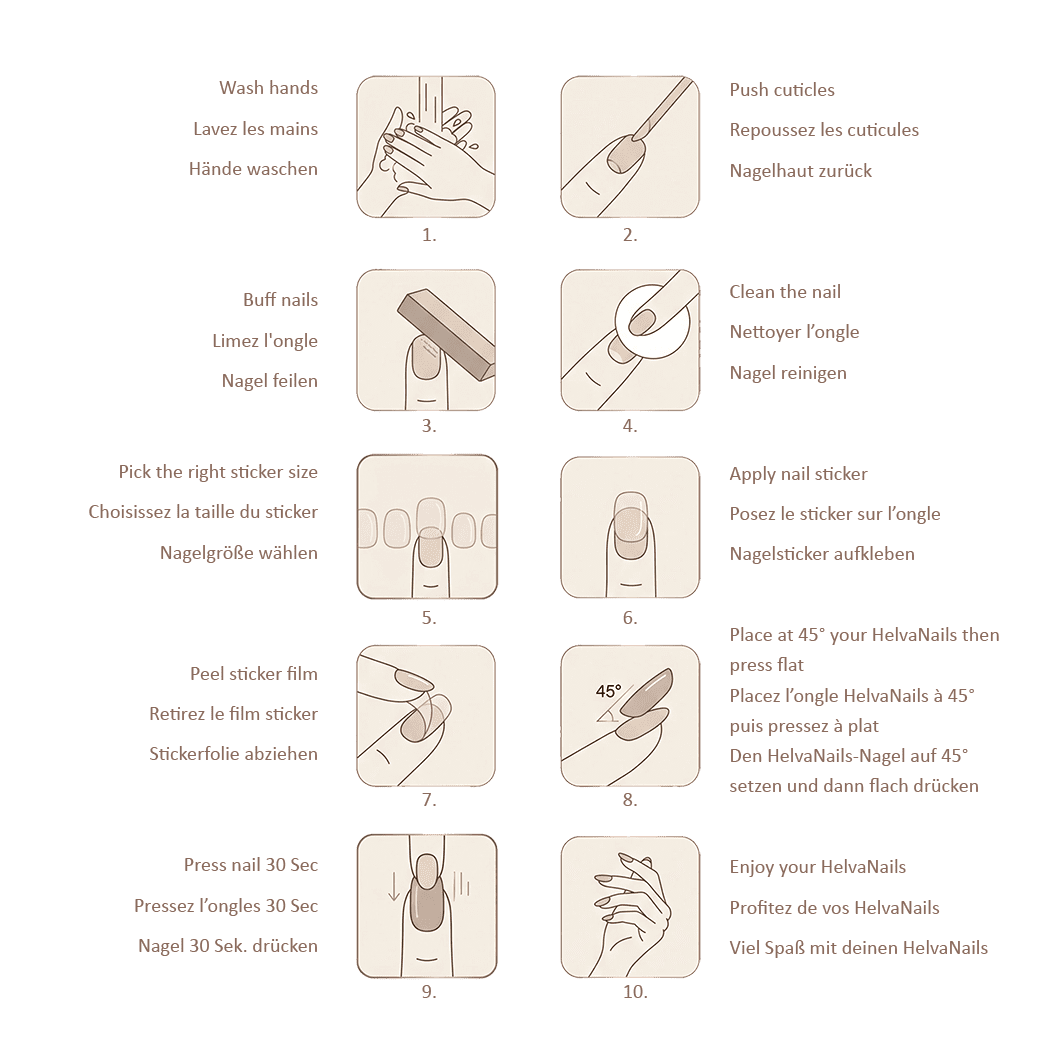
Count about ten minutes the first time, less once you have the habit. The image below is the same guide you will find printed inside your box.
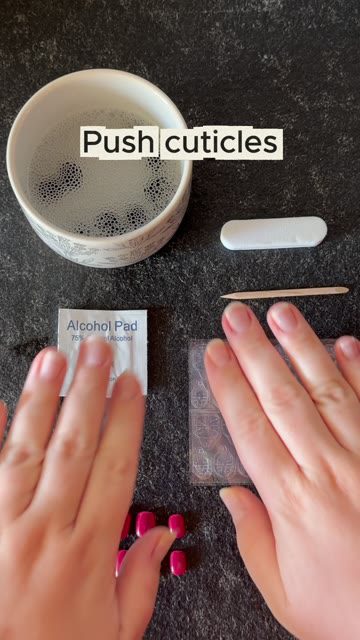
Watch the full application tutorial
Prepare your nails (steps 1 to 4)
Take your time with preparation: a clean, dry nail helps the adhesive sticker make even contact.
1. Wash your hands. Warm water and soap already remove a good part of the natural oils sitting on your nails.
2. Push back your cuticles. Use the wooden stick from your kit and work gently. A clear nail plate gives the sticker more surface to grip and keeps the press-on from lifting at the base.
3. Buff the nail. File the surface lightly until the shine is gone. A slightly matte nail grips far better than a glossy one. Stop there, the goal is texture, not thinning your nail. If your natural nails are long, trimming them short also helps: less leverage, less risk of popping off.
4. Clean the nail. Wipe each nail with a cotton pad and a drop of alcohol, then let it dry. From this point on, keep your fingertips off your nails. One touch is enough to leave oil behind.
Apply the stickers (steps 5 to 7)
5. Pick the right sticker size. The sticker should cover as much of your nail as possible without touching the skin or sticking out past the edges.
6. Apply the sticker to your natural nail. Press it down firmly across the whole surface, then smooth it out with the wooden stick. Smooth away any air bubbles so the sticker makes even contact.
7. Peel off the protective film. Lift it from a corner and avoid touching the adhesive underneath.
Set your HELVA nails (steps 8 to 10)
8. Place the nail at a 45 degree angle. Set the base down first, about one millimeter away from the cuticle, then lower the tip in a rolling motion until the nail sits flat. This angle pushes the air out instead of trapping it.
9. Press for 30 seconds. Press from the center out towards the edges, then hold the tip. Edges and tips are where lifting usually starts, so give them a few extra seconds.
10. Check the fit. Make sure each nail sits comfortably and press the edges firmly. Avoid touching the adhesive and follow the care instructions in your kit before prolonged contact with water.
If a nail lifts or comes off
A nail falls off within a day or two. The natural nail was probably still a little oily, or its surface too glossy. Clean it with alcohol, buff again until matte and start over with a fresh sticker.
You can see air bubbles under the nail. The sticker was not smoothed down enough. Remove the press-on carefully, flatten the sticker with the wooden stick, then press again for 30 seconds.
The edges lift first. The nail or the sticker is slightly too wide, or it touched the cuticle. Keep that one millimeter gap at the base and go one size down if needed.
The nail feels tight. It is a size too small for your nail bed. Switch to the next size up, each kit includes several sizes. Still unsure about your fit? Write to us, we are happy to help you measure.
Gently removing your HELVA nails
Never pull or force a press-on nail off. Take your time and use the included wooden stick to release the adhesive gently.
Slide the wooden stick gently under an edge and work slowly around the nail as it releases, as shown below. If it resists, stop instead of forcing it. You can contact us if you are unsure how to proceed.
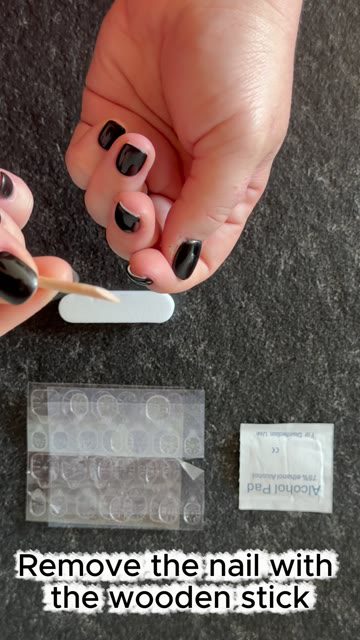
After removal, gently clear away adhesive residue. Clean the removed HELVA nails with warm soapy water, dry them completely and store them in their box for reuse. Use fresh gel stickers for your next application.
Frequently asked questions
How long do press-on nails last?
A wear time of 2 to 3 weeks is possible with careful preparation and application. Individual wear varies with your nails, hand washing and everyday activities.
Do press-on nails damage natural nails?
The gel stickers are designed for gentle removal when used as directed. Prepare the surface lightly, take your time removing the nails and never pull or force them off. Avoid applying them to irritated or damaged nails.
Can I shower and wash my hands normally?
Follow the care instructions in your kit after application and avoid prolonged soaking. Everyday activities and repeated contact with water can affect how long your nails hold.
Do press-on nails work on short nails?
Very well. Preparation matters more than length, and short nails actually give the press-on less leverage, so it tends to hold even better.
How many times can I reuse my HELVA nails?
Your HELVA nails are reusable. The number of wears depends on their condition and how carefully you apply, remove, clean and store them. Use fresh gel stickers for each application.
Ready for salon nails at home?
Explore our hand-decorated, reusable gel nails and choose a design you will enjoy wearing again.